To add a country map to your blog first you will have to follow the instructions in Add a Google Map to your blog. (Step 1) After having added the map to your blog you need the Latitude and Longitude of the point on earth where you want to center your map. Do this by entering the place name in Google along with the words 'latitude longitude' and pressing Search.
Google will give the coordinates of Latitude and Longitude for that place. Enter these figures in the following line of code in your template (Step 2). This line of code is there in your template because you entered it in Step 1 above.
map.setCenter(new GLatLng(37.4419, -122.1419), 5);
The figures in brackets are the Latitude and the Longitude of the place where you want to center the map. The next figure - 5 - is the zoom factor. NOTE that Google does not have the same detailed maps of the entire planet. If you enter a very large number here the map will not come up on the page. So start with a small figure like 5 and increase it till Google says it does not have more detailed maps.
I have added the map of India as shown in following picture :
Click on Image for larger preview.
Now you will want to add some place markers to the map. First create an image representative of the place where you will place the marker and save in PNG format. Then upload the image to a freeserver like Googlepages and copy down the url (Step 3). Then in your blog template add the following lines just after the line you added in Step 2 to the template :
var point = new GLatLng(18.96,72.82);
var marker = createMarker(point,'<div style="width:240px">NAME OF PLACE<br /><a href="MY SITE URL">Link</a> to my home page<br /><img src="URL OF PLACE IMAGE" width=XXX height=YYY></div>')
map.addOverlay(marker);
Enter the Latitude and Longitude of the place where you want to place the marker in line 1 of the above code. Enter the place name instead of 'NAME OF MY PLACE'. Enter your site link url instead of 'MY SITE URL'. Enter the url of the image you noted down in Step 3 instead of 'URL OF PLACE IMAGE'. Enter the width and height of the image in pixels instead of XXX and YYY.
Save Template. See the image above where I have added it to Delhi. To see this map in action go to Google Ajax Made Easy. and click on the marker for Delhi.
Loading...
Thursday, November 23, 2006
Tuesday, November 21, 2006
Google Map Demo
This blog has been created to show how you can embed a Google map in a blog.
To add a Google Map to your blog go to http://www.google.com/apis/maps/ and click on the Sign up for a Google Maps API key button. It will take you to this page :
http://www.google.com/apis/maps/signup.html. This key identifies your web site to Google and helps them track usage of Google Maps. A new and distinct key is needed for each directory on your website that includes Google Maps.
Put a check in the box where it says I have read and agree with the terms and conditions and paste your blog url in the text box below and click on Generate API Key button.
Copy paste this code (ONLY THE BLUE LINES) just below the title tag in your template :
<script src='http://maps.google.com/maps?file=api&v=2&key=YOUR KEY' type='text/javascript'>
IN THE ABOVE LINE ADD amp; AFTER BOTH THE & CHARACTERS OR YOU WILL GET ERROR MESSAGE.
</script>
<script type="text/javascript">
//<![CDATA[
function load() {
if (GBrowserIsCompatible()) {
var map = new GMap2(document.getElementById("map"));
map.setCenter(new GLatLng(37.4419, -122.1419), 13);
}
}
//]]>
</script>
Type in your Google API key code where it says 'YOUR API KEY CODE HERE' above.
Save Template.
Then paste this code inyour template just after <body> tag :
<body onload="load()" onunload="GUnload()">
<div id="map" style="width: 500px; height: 300px"></div>
</body>
Save Template.
Paste this code in the css part of your template :
#map {
float:right;
margin:10px 20px 10px 10px;
}
Save Template
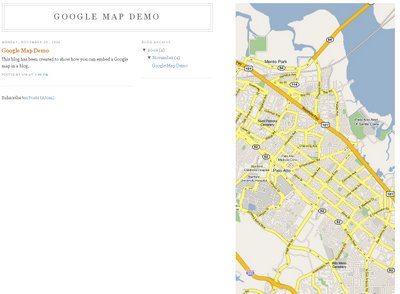
See how I have added it to my test site : http://googlemapdemo.blogspot.com/
Click on image below for larger view.
IMPORTANT : It is necessary to have an empty space in the right hand part of the body of your template to add this in the way I have done. I have used the Minima template and added a float left property to the outside wrapper to create room for the Google Map on the right side.